
A fresh installation of Audacity isn’t optimised for scanning nocmig recordings, but with some simple tweaks it can be ready on demand. Follow these steps (NB other settings may also help but these are the key ones).
The first time you open a recording in Audacity the view shown is ‘Waveform’, which is of little use to nocmiggers – except for highlighting when the dawn chorus started!

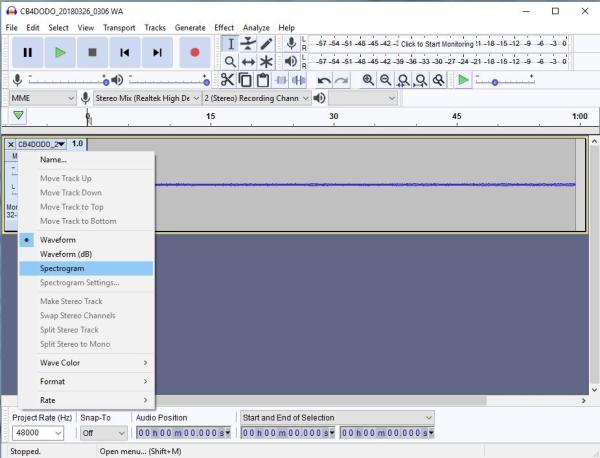
You can toggle to the spectrogram view by clicking the small black down arrow in the small panel to the left of the waveform. Select Spectrogram…
…and the view changes to the Spectrogram.
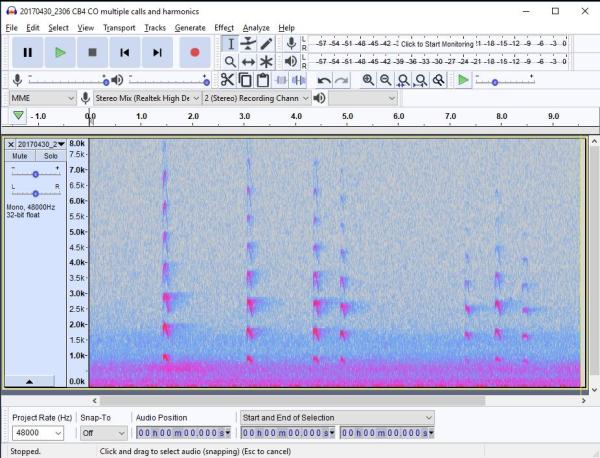
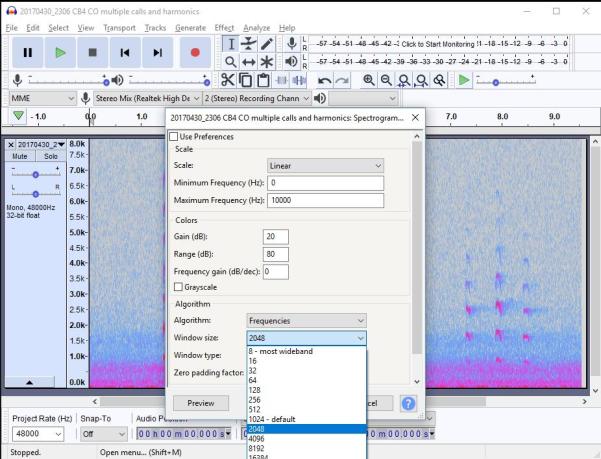
This is a good start, but the y-axis (frequency range) only goes up to 8 kHz and some birds vocalise at higher frequencies. To change this, click the black arrow again, select Spectrogram settings. Here you can adjust the Maximum Frequency to 10000 or 11000. You may also wish to adjust the Window size, which changes how pixellated the image is. For normal viewing we usually select 2048 or the default 1024. When zooming in to small sections of calls you may need to reduce this. We find this a bit of a dark art!
It’s useful to know how to do this, but to avoid having to do this every time you can set these as defaults by going to Edit > Preferences. To ensure new files open in spectrogram view, click on Tracks on the left and select Spectrogram in the Default view mode. Don’t click OK yet!

Next, Tracks > Spectrograms on the left to make the desired adjustments to Maximum Frequency and Window size. Don’t click OK yet!

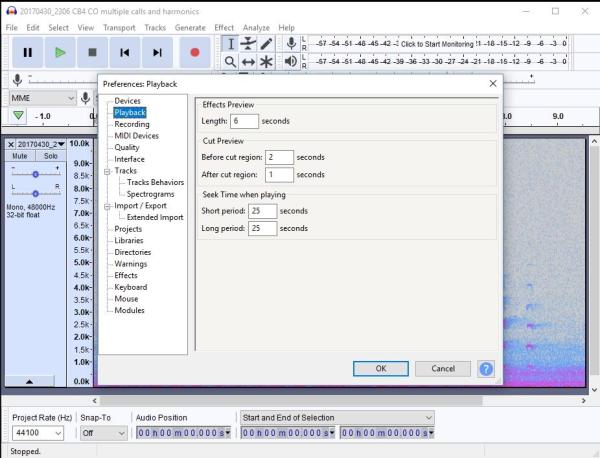
Finally, select Playback on the left and adjust the Seek Time when playing settings. These two settings adjust by how much the player jumps back and forth with presses of the <, and >. keys. As we usually have 30 seconds on screen at a time, we have the jump set to 25s but this is down to personal preference. Now click OK!
You should now have Audacity configured in nocmig mode 🙂
